How to redirect one Domain to Another with Cloudflare explained.

Hey 👋🏻,
I am a Software Engineer from Austria 🇦🇹. I am interested in, write about, and develop (open source) software solutions for and with JavaScript, TypeScript, ReactJs, and NodeJS.
You can see what I am currently up to on natterstefan.me.
In the past, I was Product Owner of RAWR, Growth Hacker at the Speedinvest Startup Studio and Online Advertising Manager. Check out my LinkedIn profile for more details.
📬 Get in touch- Twitter: twitter.com/natterstefan
- Blog: dev.to/natterstefan
- Web: natterstefan.me
- LinkedIn: linkedin.com/in/natterstefan
📧 Sign up for my newsletter.
Up until a few days ago, I did not know you can manage URL and domain redirects and forwarding directly in the Cloudflare dashboard. Other domain name registrars and web hosting companies can do this too (eg. name.com), but I did not know how to manage this in Cloudflare. Maybe you don’t know either and that is why this post exists. Let me show you.
Scenario
Let’s assume you want to redirect from old-domain.com to new-domain.com.
Step 1 — Update DNS Settings
First, make sure you manage the domain you want to redirect from on Cloudflare. Next thing you do is adding the following DNS settings:
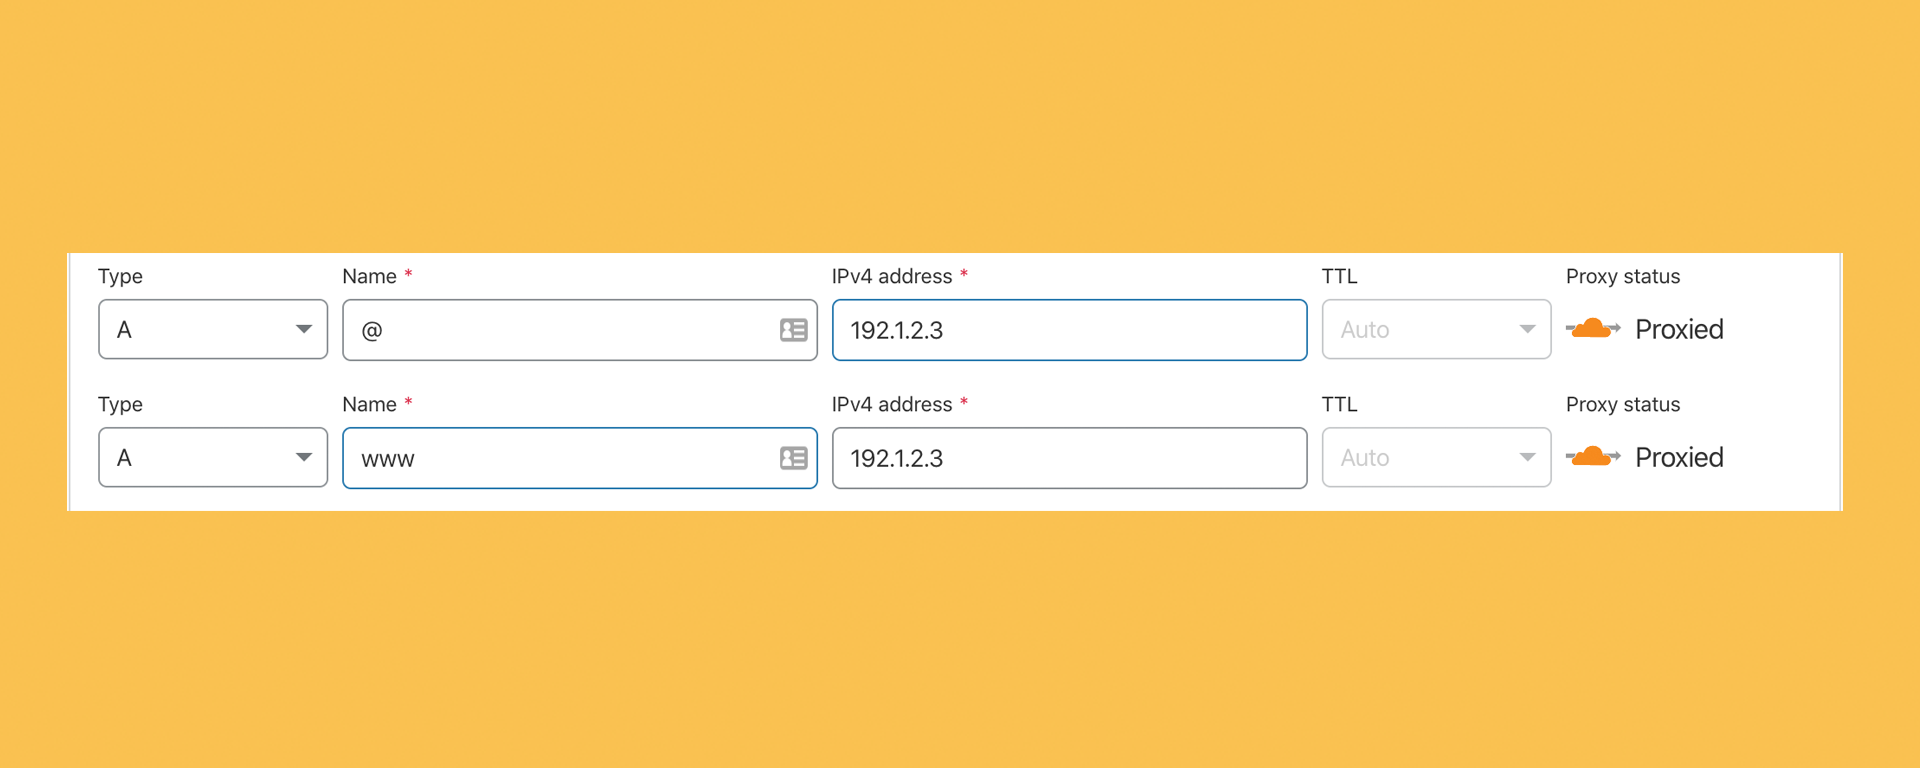
In this case, we redirect the root (@) and www of the domain. Point it to a dummy domain, in this case, 192.1.2.3 (got this from here). It’s important that you set the proxy status to Proxied.
Step 2 — Set up Page Rules
Finally, we add a redirect page rule. When you are not sure which status code fits, read “301 vs. 302 Redirects & SEO: The What, Why & How” on searchenginejournal.com.
In this example, every hit on the old domain (no matter if you open the site with or without www or with https or http) is redirected to the new one.
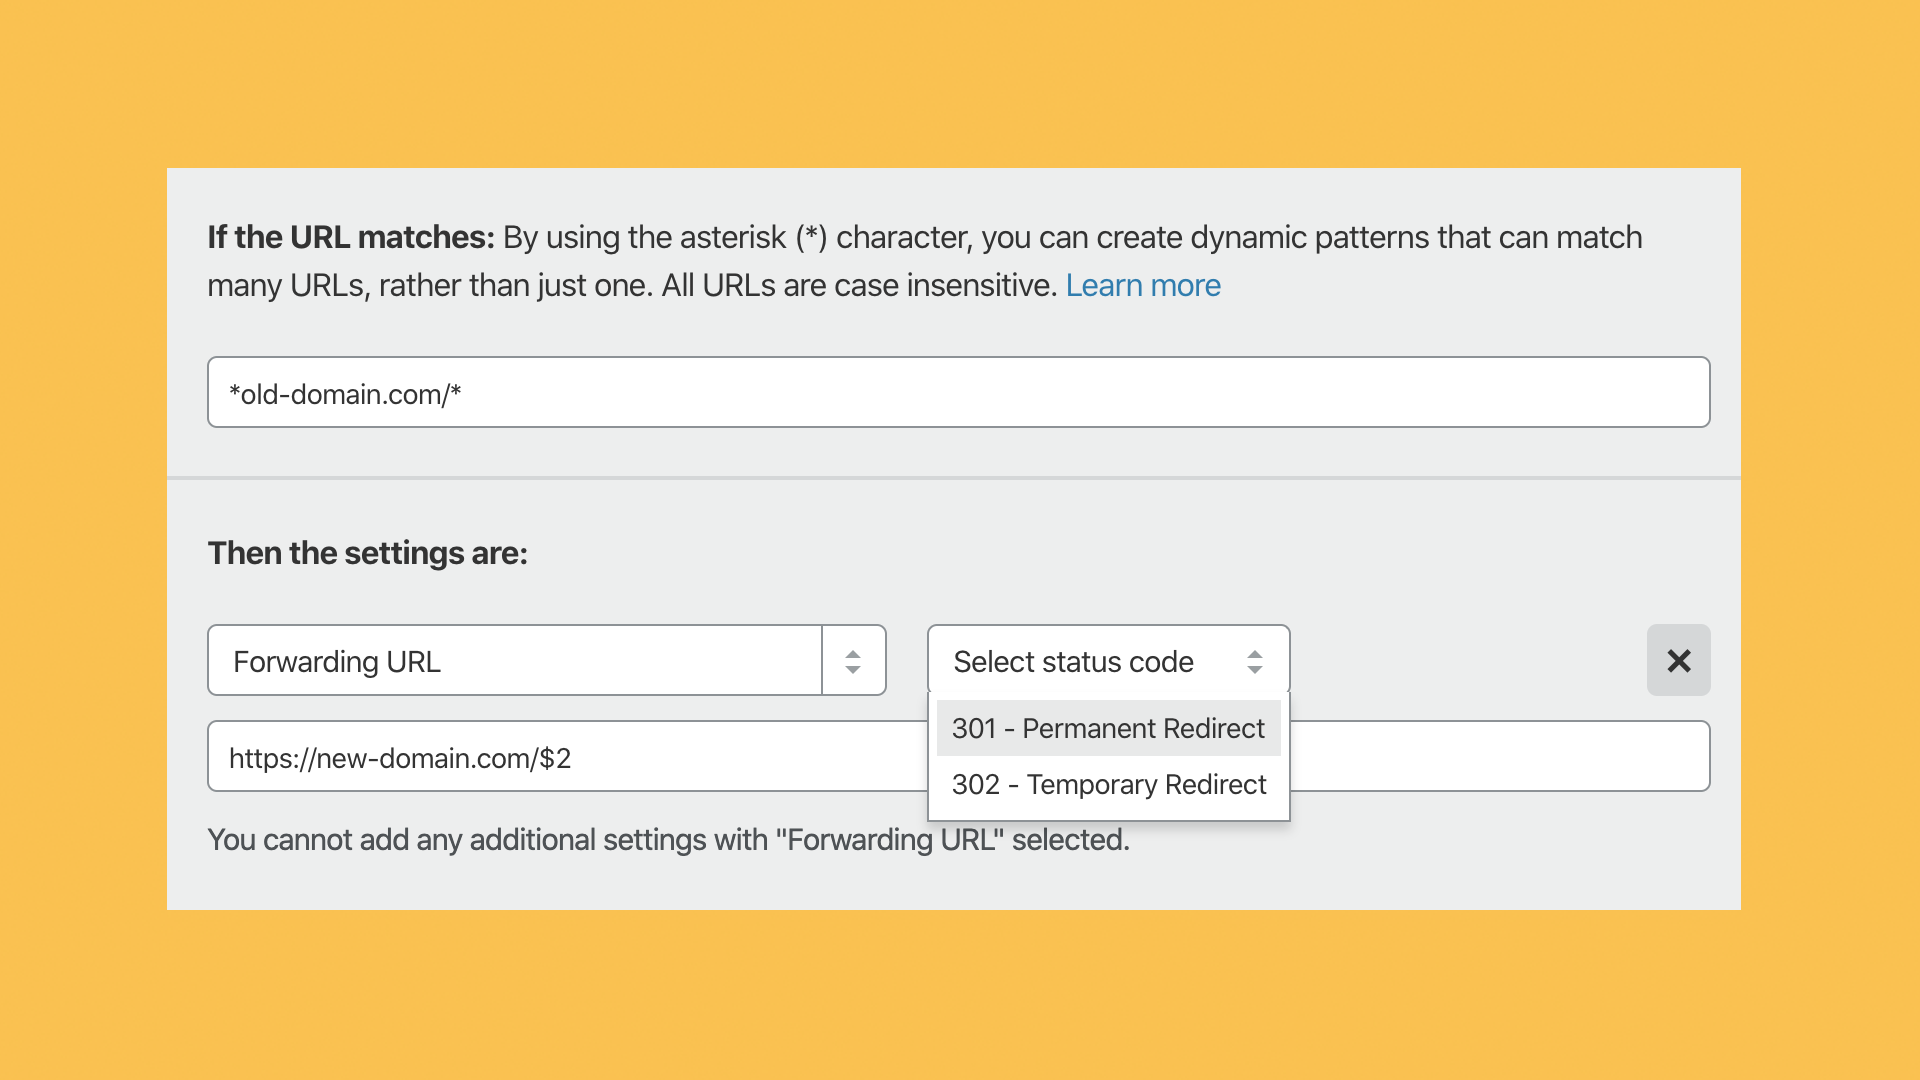
What does this page rule do now? If the URL matches it will forward the browser to the new target. The following examples will be redirected:
old-domain.com=>https://new-domain.comwww.old-domain.com=>https://new-domain.comold-domain.com/hello=>https://new-domain.com/hellowww.old-domain.com/hello=>https://new-domain.com/hello
That’s it. You successfully redirected a domain to another with Cloudflare. Congrats!


